Sign in to Cloudflare (or create a free account)
Open the Cloudflare dashboard. If you don't have an account yet, create one, it's free. Verify your email address and keep a payment card handy for the domain purchase.
Open the Cloudflare dashboardRegister your domain name
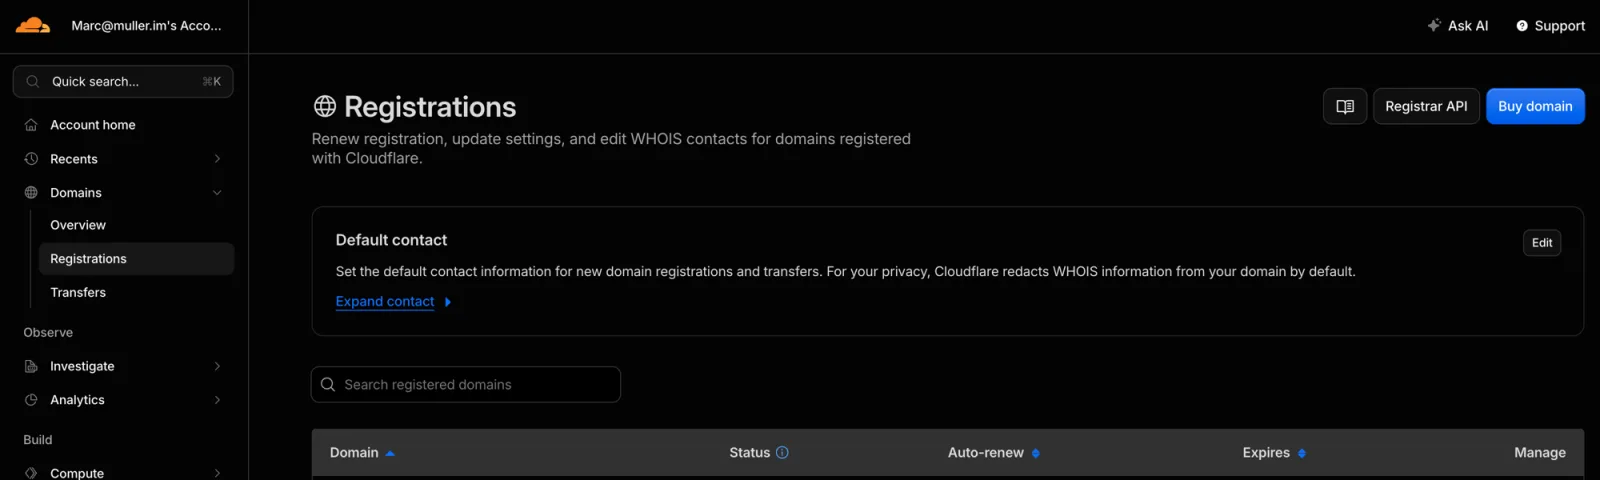
In the sidebar, expand "Domains" then click "Registrations". At the top right of the page, click the blue "Buy domain" button, search for the name you want, for example my-business.com, and pay by card.
Cloudflare sells domains at cost, with no markup: you pay the registry price, usually around 10 to 13 USD per year for a .com, at the same price every year. The DNS zone is created automatically in your account.
Path in the dashboard
Sidebar > Domains > Registrations > "Buy domain" button
You only need the domain name. Your site hosting is part of my service, on Cloudflare's own infrastructure, so everything ends up in one place.
Open member management
At the bottom of the sidebar, expand "Manage account" then click "Members". On the "All members" tab, click the blue "+ Invite members" button at the top right.
Path in the dashboard
Sidebar > Manage account > Members > "+ Invite members" button

Invite me with my email address
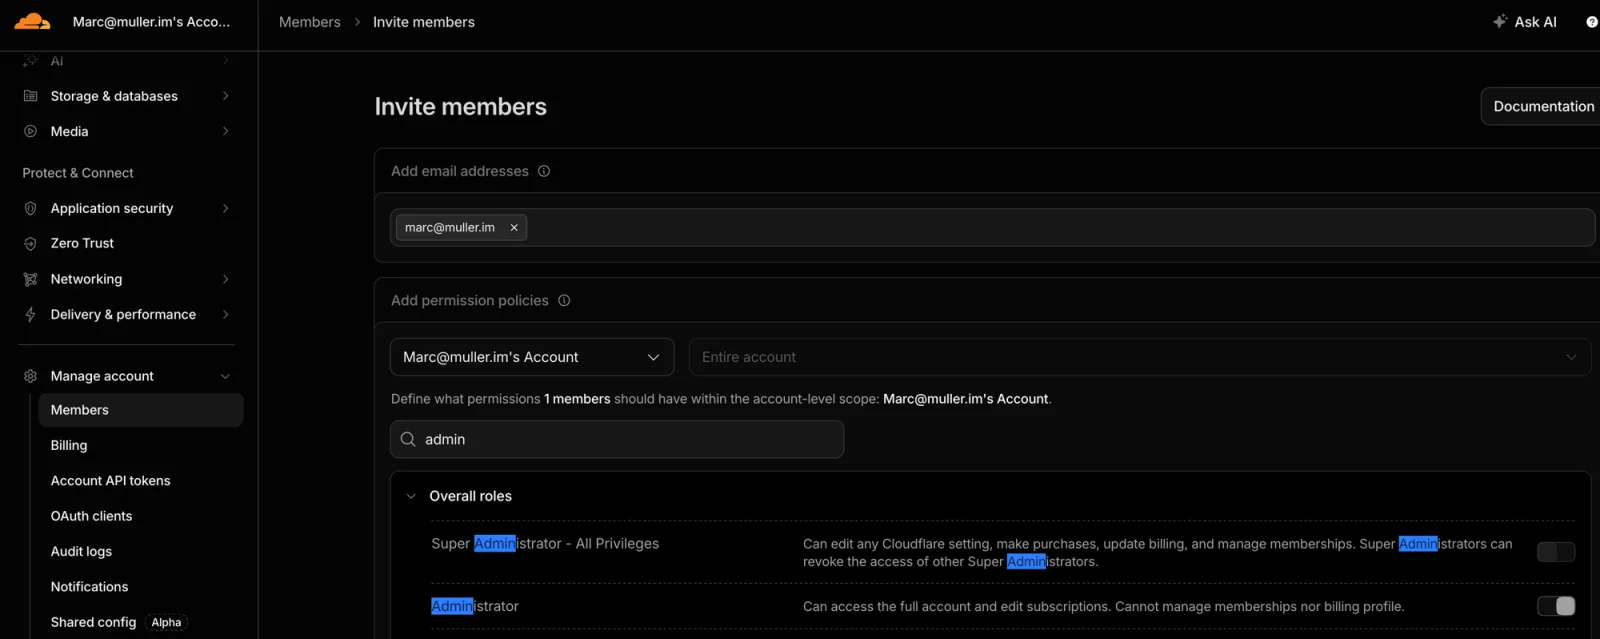
On the "Invite members" page, in the "Add email addresses" section, enter my email address. It then shows up as a chip:

Pick the "Administrator" role
Just below, in the "Add permission policies" section, leave both menus on their defaults (your account, then "Entire account"). In the "Search by role name..." field, type "admin": the "Overall roles" group shows two roles. Turn on the toggle for "Administrator", not the one for "Super Administrator - All Privileges", then click "Create policy".
Cloudflare describes "Administrator" as: "Can access the full account and edit subscriptions. Cannot manage memberships nor billing profile." That is exactly the scope I need. On the screenshot the account shown is "[email protected]'s Account"; on your side it will be the name of your own account.
Confirm the invitation
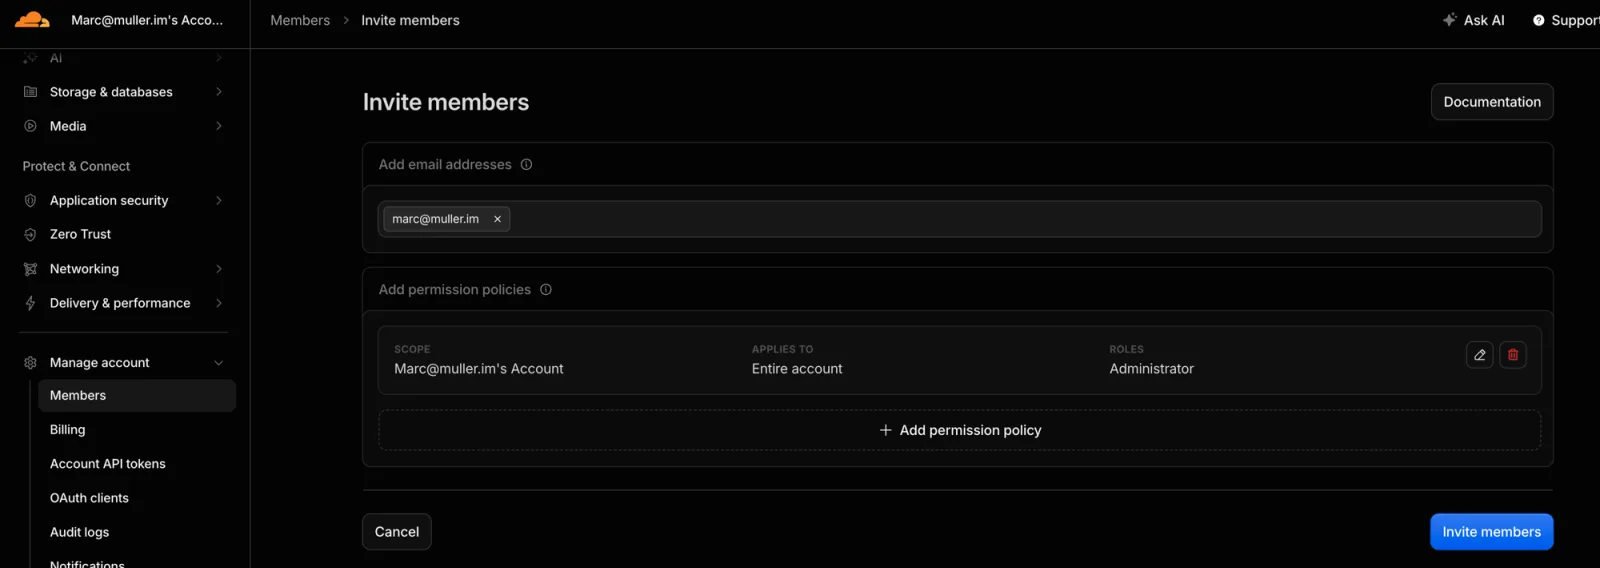
A summary card appears in "Add permission policies": check that it reads "SCOPE" your account, "APPLIES TO" "Entire account" and "ROLES" "Administrator". If it does, click the blue "Invite members" button at the bottom right.
Let me know it's done
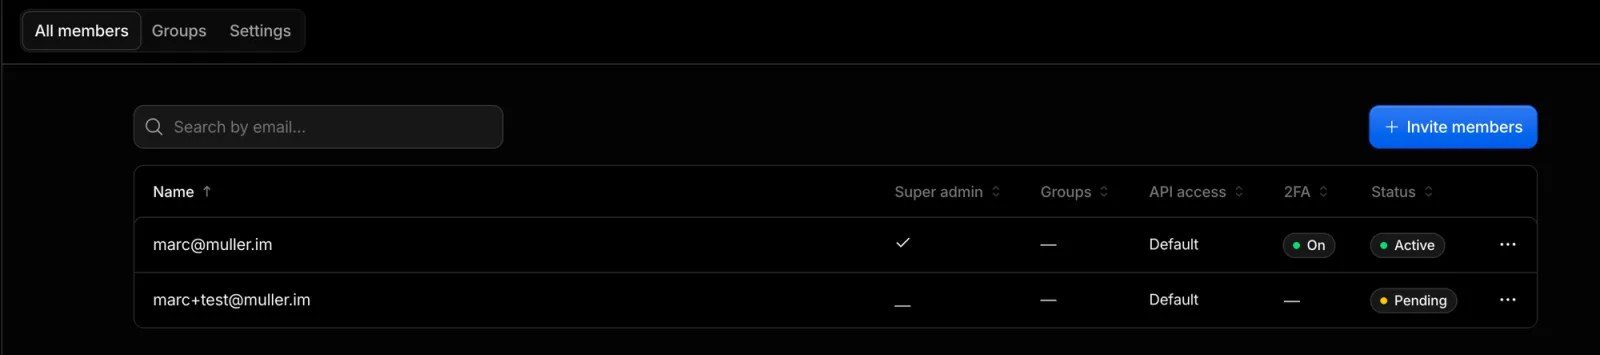
In the "All members" list, I now appear with the "Pending" status: that's normal, all that's left is for me to accept the invitation I receive by email. Send me a message by email or WhatsApp with the registered domain name, and I'll start the DNS setup to point to your site.
You stay in control
The "Administrator" role gives me control over the technical side, nothing more. No access to your billing or card, no member management (I can't invite or remove anyone), and no domain deletion (reserved for the "Super Administrator", which is you). You remain the sole owner of the account and the domain, and you can revoke my access anytime: "Members", the row with my name, "Revoke", then "Yes, revoke access".
Tips
- Turn on domain auto-renew so you don't risk losing it (renewal is charged to your card, at cost).
- Enable two-step verification (2FA) on your Cloudflare account: a simple, effective security habit.
- Don't touch any DNS setting yourself, I handle it.
Frequently asked questions
Why buy my domain at Cloudflare?
Cloudflare sells domains at cost, with no markup and no pushy add-ons. Since your site is hosted on Cloudflare's infrastructure anyway, the domain and the site end up in one place: simpler to manage and to track.
Does Marc have access to my card or billing?
No. The "Administrator" role gives no access to billing or payment methods. I can manage the domain's technical side (DNS, SSL, settings), none of your banking details.
Can I remove this access later?
Yes, anytime. Go to "Members", find the row with my name, click "Revoke" then confirm with "Yes, revoke access". Access is cut immediately, and you don't need anyone to do it.
Who pays for the domain, and how much?
You do, directly at Cloudflare, at cost: usually around 10 to 13 USD per year for a .com, no markup. Renewal is charged to your card at the same price. I recommend turning on auto-renew.
Do I also need to buy hosting?
No. Your site is hosted on Cloudflare Pages, that's part of my service. At Cloudflare, you only need the domain name.
Once the invite is sent
Send me your domain name by email or WhatsApp.